
After gathering all the necessary information, it's time to embark on the exciting journey of the design process! Keep in mind that the goal of packaging design is to tell a story about the product. Your choices during the design process will be instrumental in conveying that story. Therefore, it's essential to approach the design with a clear vision and focus on creating a visual narrative that accurately represents the brand and product.
1. Understand packaging layers
Understanding the different layers of packaging can be helpful when designing a product package. There are typically three layers of packaging:
Primary Packaging: This is the layer that comes into direct contact with the product. For example, a bottle for a drink, a box for a pair of shoes, or a bag for a snack. The primary packaging should not only protect the product but also make it easy to use and visually appealing.
Secondary Packaging: This layer is used to group multiple units of the primary package together, making it easier to transport and store the product. Examples include a case for beer cans or a carton for cereal boxes.
Tertiary Packaging: This layer is used to protect the product during transportation and storage. It includes things like pallets, crates, and shrink wrap.
Each layer of packaging has its own unique requirements and design considerations. Primary packaging should be designed to protect and promote the product, while secondary packaging needs to be strong enough to hold multiple primary packages without damaging them. Tertiary packaging must be durable and able to withstand the rigors of transportation and storage.
By understanding the different layers of packaging, designers can create a comprehensive packaging solution that meets all the requirements and effectively communicates the brand's message.

2. Choose the right type of packaging
Choosing the right type of packaging is essential for ensuring that your product remains safe and secure throughout the transportation and storage process. Here are a few factors to consider when selecting the appropriate packaging for your product:
Product Type: Consider the type of product you're packaging. Different products require different packaging solutions. For example, fragile items like glassware require packaging with added cushioning and support to prevent breakage during transportation.
Transportation Method: Think about how your product will be transported to its destination. If it's going to be shipped, it will need to withstand the bumps and knocks that occur during shipping. In contrast, if it's going to be transported by hand or delivered locally, it may not need as much protection.
Storage Conditions: Consider the storage conditions your product will be subjected to. For example, if your product is perishable or sensitive to temperature, you may need to choose packaging that provides insulation to keep it at the right temperature.
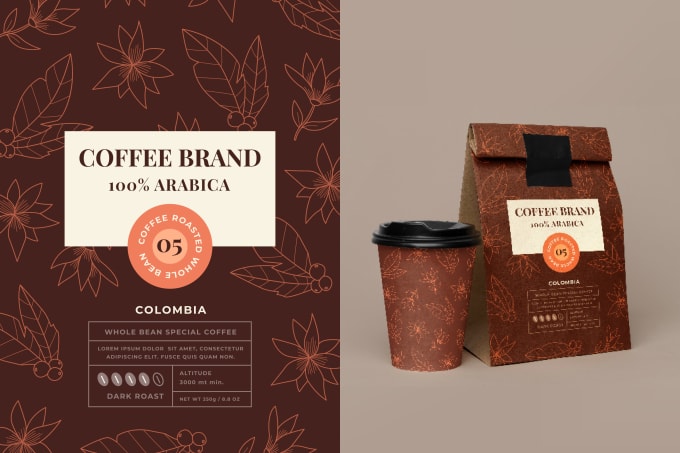
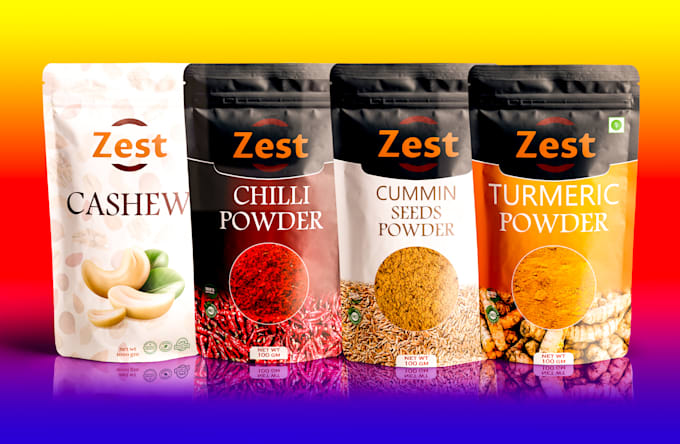
Branding: Your packaging should reflect your brand's identity and message. Consider the size, shape, and color of your packaging and how they can be used to reinforce your brand's image.
Environmental Impact: It's important to consider the environmental impact of your packaging. Choose materials that are recyclable or biodegradable to reduce waste and minimize your carbon footprint.
By taking these factors into account, you can select the right type of packaging for your product that protects it during transportation and storage, while also effectively communicating your brand's message.

3. Line up your printer
To ensure that your packaging design is printed accurately and looks the way you intended it to, it's important to line up your printer early on in the process. This means finding a reliable and experienced printer who can handle the specific requirements of your packaging design, such as the type of material, colors, and finishes. You should also communicate your budget and timeline with your printer to ensure that they can deliver the final product within your constraints. Additionally, it's a good idea to request a physical proof of the packaging design before printing the entire order to check for any errors or issues that may have been missed in the digital proof.
4. Create your information architecture
Information architecture refers to the way in which information is organized, structured, and presented within your packaging design. It's important to establish a clear and consistent information architecture to ensure that the important details about your product are communicated effectively to the consumer.
Start by identifying the key pieces of information that you want to include on your packaging design, such as product name, brand logo, product features and benefits, ingredients, usage instructions, and any required legal or regulatory information. Then, organize this information in a hierarchy that makes sense for your product and brand.
Consider using visual cues, such as typography, color, and icons, to help guide the consumer's eye and make the information easy to scan and understand. Be sure to test the information architecture with real users to ensure that it's effective and easy to navigate.
5. Evaluate a packaging design
Evaluating a packaging design involves assessing its effectiveness in communicating key information about the product and brand, as well as its visual appeal and functionality. Here are some key factors to consider when evaluating a packaging design:
Brand identity: Does the packaging design effectively communicate the brand's values and personality? Is the brand logo and messaging prominently displayed?
Product information: Is the packaging design clear and concise in communicating key product information, such as product name, features, benefits, and usage instructions? Is the information hierarchy effective?
Visual appeal: Is the packaging design visually appealing and eye-catching? Does it stand out on store shelves and differentiate the product from competitors?
Functionality: Is the packaging design functional and easy to use? Is it durable enough to protect the product during shipping and storage? Is it easy to open and reseal?
Sustainability: Does the packaging design take into consideration environmental concerns and sustainable practices, such as using eco-friendly materials and minimizing waste?
User feedback: Finally, it's important to gather feedback from users through surveys or focus groups to understand how they perceive the packaging design and what improvements could be made.
By evaluating these factors, you can determine the strengths and weaknesses of a packaging design and make informed decisions about how to improve it for better consumer engagement and sales.
6. Collect feedback
Collecting feedback is an important step in the packaging design process as it helps to ensure that the final product meets the expectations and needs of the target audience. Here are some tips for collecting feedback on your packaging design:
Target your audience: Identify the people who will be using or buying your product and ask for their feedback. Consider their demographics, preferences, and behavior when gathering feedback.
Provide context: Show your packaging design in context, such as in a store or on a shelf, so that your audience can see how it will look in the real world.
Use prototypes: Create physical or digital prototypes of your packaging design to get a better understanding of how it will look and function.
Ask open-ended questions: Avoid asking leading questions and instead ask open-ended questions that encourage honest and detailed feedback.
Test multiple designs: Test multiple packaging designs to see which one resonates best with your audience.
Consider all feedback: Consider all feedback, both positive and negative, and use it to make informed decisions about your packaging design.
By following these tips, you can collect valuable feedback that will help you create a successful packaging design.
7. Get the right files from your designer
Getting the right files from your designer is crucial to ensure that your packaging design looks great when printed. The designer should provide you with a set of files that includes the final design in various formats suitable for different uses. These may include:
Vector files: These are essential for resizing the design without losing quality. The most common vector file formats are AI, EPS, and PDF.
High-resolution images: These are necessary for printing the design in high-quality. The most common high-resolution image formats are JPEG, TIFF, and PNG.
3D mockups: These are helpful to visualize how the final product will look like. They are usually provided in JPEG or PNG format.
Make sure to ask your designer for all the necessary files and formats before finalizing the project to avoid any issues during the printing process.
Packaging design glossary
Here are some common packaging design terms you may come across:
Bleed: The area of the design that extends beyond the final trim size to ensure that the ink covers the entire surface.
Die-cut: The process of cutting the packaging material into a specific shape using a custom-made cutting tool or die.
Embossing: The process of creating a raised design on the surface of the packaging by applying pressure from underneath.
Foil stamping: The process of applying a thin layer of metallic foil to the surface of the packaging to create a decorative effect.
Gradients: A gradual transition from one color to another, creating a smooth blend of colors.
Pantone color: A standardized color matching system used in the printing industry to ensure accurate color reproduction.
Point-of-sale (POS): The location where the product is sold to the end customer, such as a retail store or online marketplace.
Typography: The art and technique of arranging type to make written language legible, readable, and appealing when displayed.
UV coating: A high-gloss or matte finish applied to the surface of the packaging to protect it from damage and enhance its appearance.
White space: The area of the packaging that is intentionally left blank or unmarked to create visual balance and improve readability.


.jpg)


.jpg)

.jpg)


0 Comments